티스토리 뷰
지난 시간에 Eureka Server와 Eureka Client를 구성해 봄으로써 Service Registry, Discovery에 대해서 알아보았다. MSA처럼 여러개의 API Service 들을 생성하고 그것을 Eureka에 regist까지 해봤다. 이제 이 Eureka에 등록된 서비스들에 대해서 어떻게 접근하고 사용하는지 그 방법인 Spring Cloud Netflix Zuul을 이용해 API Gateway 구성을 해보려고 한다.
API Gateway는 Service Routing 기능과 고가용성을 적용할 수 있으며 가볍게 설계된 디자인 패턴이다.
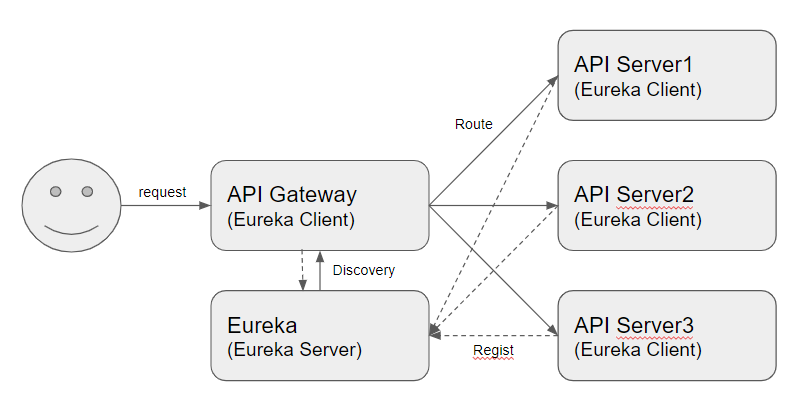
일단 설명에 앞서 지난번에 구성해봤던 Eureka와 API 서버에 API Gateway를 붙인 구성도이다.
요청이 들어오면 API Gateway가 Eureka Server로부터 정보를 받아서 이 요청이 어디로 갈건지 결정을 해서 적절한 서비스로 라우팅을 해준다. 이때 Service Registry(Eureka Server)로부터 주소정보를 조회하기 위해서 API Gateway도 Eureka Client로 등록이 되어 있어야 한다. API Gateway는 Service Registry에 등록된 Eureka Client의 spring.application.name (Service ID) 정보로 해당 서비스에 접근을 할 수 있다.
API Gateway를 해주는 여러가지 기술들이 있지만 가장 범용적이고 간단하게 사용할 수 있는 Zuul API Gateway에 대해서 어떻게 구성하는지 지금부터 알아보도록 하자.
Zuul API Gateway 구성
Eureka를 생성했던 것과 마찬가지로 spring initializr 에 들어가서 Zuul 프로젝트를 만들어본다.
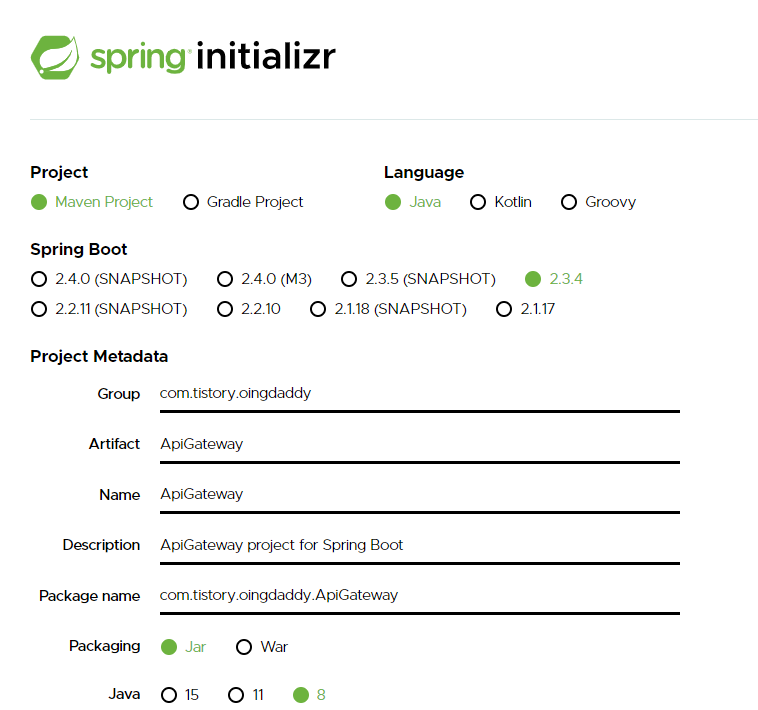
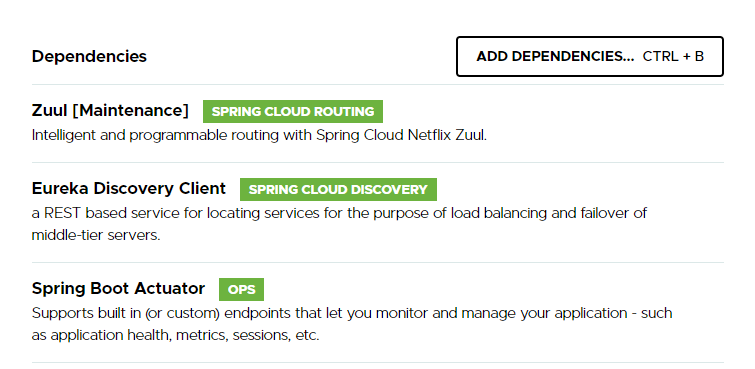
Maven 프로젝트로 만들고 dependency는 Zuul과 Eureka Discovery Client와 Spring Boot Actuator를 추가시켜준다.
다 하고 나서는 하단의 Generate 를 눌러서 다운로드를 받는다.
그 다음 다운받은 Maven 프로젝트를 import 하는것은 지난 글을 참조한다.
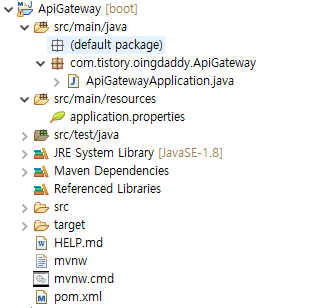
import를 다 하면 위와 같은 구조의 프로젝트가 생성된다. springboot 프로젝트이기에 전과 같은 동일한 구조로 생성이 되었다. 구성은 간단하다. ApiGatewayApplication.java 파일과 application.properties, 그리고 pom.xml 정도 보면 된다.
ApiGatewayApplication.java
package com.tistory.oingdaddy.ApiGateway;

import org.springframework.boot.SpringApplication;
import org.springframework.boot.autoconfigure.SpringBootApplication;

@EnableZuulServer
@EnableEurekaClient
@SpringBootApplication
public class ApiGatewayApplication {

    public static void main(String[] args) {
        SpringApplication.run(ApiGatewayApplication.class, args);
    }
}
여기에서는 @EnableZuulServer (or @EnableZuulProxy)와 @EnableEurekaClient를 추가해주면 된다. @EnableZuulServer는 말 그대로 이 서비스는 Zuul Server라는 것을 명시하고 @EnableZuulProxy를 사용해도 된다. @EnableZuulProxy를 사용하면 @EnableZuulServer + PreDecorationFilter + RibbonRoutingFilter + SimpleHostRoutingFilter 기능을 추가로 사용할 수 있다.
@EnableEurekaClient는 Eureka Server의 정보를 얻기 위해서 추가를 시킨다.
application.properties
spring.application.name=ApiGateway
server.port=${PORT:8100}

management.endpoints.web.exposure.include=*

eureka.client.serviceUrl.defaultZone=http://localhost:8080/eureka/
일단은 아무런 zuul 관련 property나 ribbon의 property를 추가하지 않고 가장 기본으로 설정하였다.
이렇게 하면 기본적인 Zuul API Gateway 구성이 끝났다.
Zuul API Gateway 테스트
지금껏 구성한것은 지난시간에 구성해놓은 EurekaServer 와 EurekaClient들, 그리고 API Gateway가 있다.
정상적으로 API Gateway가 Eureka Server에 등록이 되었는지 어플리케이션 구동을 한 후 http://localhost:8080 (Eureka Server) 로 들어가서 확인을 해보자.

지정한대로 APIGATEWAY라는 application 이름으로 잘 등록이 되어있다.
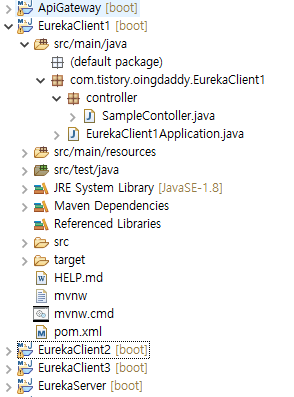
테스트를 하기 위해서는 기능이 필요하다. 지난시간에 EurekaClient에 SampleController를 만들어 놓자고 했었다. 샘플로 만들어놓은 3개의 API 서버에 각각 이 SampleController를 넣어두자.
SampleController.java (EurekaClient1)
package com.tistory.oingdaddy.EurekaClient1.controller;

import org.springframework.web.bind.annotation.RequestMapping;
import org.springframework.web.bind.annotation.RestController;

@RestController
public class SampleContoller {

    @RequestMapping("/hello")
    public String printHelloWorld() {
        return "Hello MSA World! : 1st Client";
    }
}
SampleController.java (EurekaClient2)
package com.tistory.oingdaddy.EurekaClient2.controller;

import org.springframework.web.bind.annotation.RequestMapping;
import org.springframework.web.bind.annotation.RestController;

@RestController
public class SampleContoller {

    @RequestMapping("/hello")
    public String printHelloWorld() {
        return "Hello MSA World! : 2nd Client";
    }
}
SampleController.java (EurekaClient3)
package com.tistory.oingdaddy.EurekaClient3.controller;

import org.springframework.web.bind.annotation.RequestMapping;
import org.springframework.web.bind.annotation.RestController;

@RestController
public class SampleContoller {

    @RequestMapping("/hello")
    public String printHelloWorld() {
        return "Hello MSA World! : 3rd Client";
    }
}
다 되었다면 모든 서비스(EurekaServer, EurekaClient1, EurekaClient2, EurekaClient3, APIGateway)를 기동을 시켜준다.
그리고 spring actuator의 기능을 이용해서 API Gateway 서버의 http://localhost:8100/actuator/routes 를 통해서 routing 할수 있는 목록을 확인해 본다.

어플리케이션은 3개를 올렸지만 EurekaClient2와 EurekaClient3은 이중화가 되어 있어서 총 두개만 나온다.
이제 이 정보를 토대로 API 호출을 한번 해보자. 아까 Controller에 /hello 를 만들어 놨으니 이걸로 접근해보자.

당연히 localhost:8100/eurekaclient1/hello는 하나의 어플리케이션이 매핑이 되어있으므로 원하는 출력 결과가 나온다.
localhost:8100/eurekaclient2/hello 로 접근을 해보면 이곳은 두개의 어플리케이션이 이중화되어 매핑되어 있으므로 새로고침할때마다 다른 서버를 바라봐서 다른 결과가 출력이 된다.


이번에도 참 간단하게 API Gateway가 구성이 되었다. 다시 느끼지만 참 대단하신 분들이다.
끝!
'DevOps > MSA' 카테고리의 다른 글
| [MSA 시작 #4] Spring Cloud Config + Github 을 이용한 설정 변경 동적으로 반영하기 (0) | 2020.10.08 |
|---|---|
| Zuul application.properties Configuration 번역 (0) | 2020.10.08 |
| Eureka application.properties Configuration 번역 (0) | 2020.10.08 |
| [MSA 시작 #2] Service Discovery (Eureka) Server, Client 간단하게 구성해보기 (0) | 2020.10.06 |
| [MSA 시작 #1] MSA 개념 아주 쉽게 이해하기 (0) | 2020.10.05 |